Want to know how to Install CMake With Winget? If yes then you are at the right place.
CMake is an open-source, cross-platform build system used to manage the build process of software projects.
It is used for automating the build process of software and can generate build environments for multiple platforms and IDEs from a single set of configuration files.
Windows Package Manager, also known as “Winget,” is a command-line package manager designed for Windows 10 and later versions.
It allows users to search for, install, and manage software packages directly from the command line or PowerShell.
In this guide i’m going to show you how you can install CMake with Winget.
Installing CMake With Winget
Make sure your Windows 10 or Windows 11 is up to date, as Winget requires at least Windows 10 version 1709 (build 16299) or later.
To install CMake using Windows Package Manager (Winget), you can follow these steps:
- First, you need to open Command Prompt or PowerShell with administrator privileges.
- If you haven’t used Winget before, you may need to check if it’s installed on your system.
- You can do this by typing winget in the command prompt or PowerShell and pressing Enter.
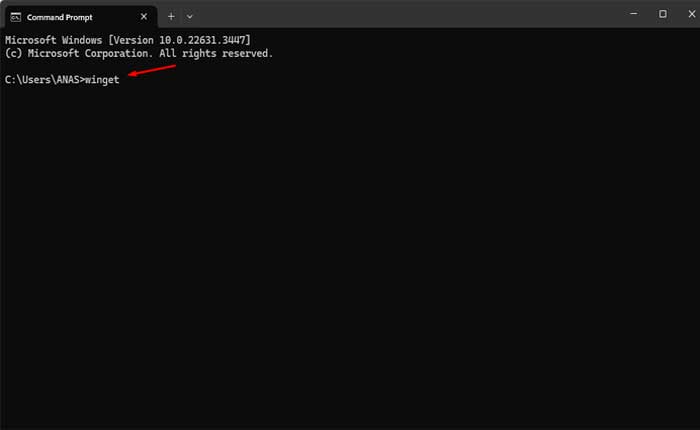
- If Winget is installed, you will see its usage information.
- If not, you need to install it first.
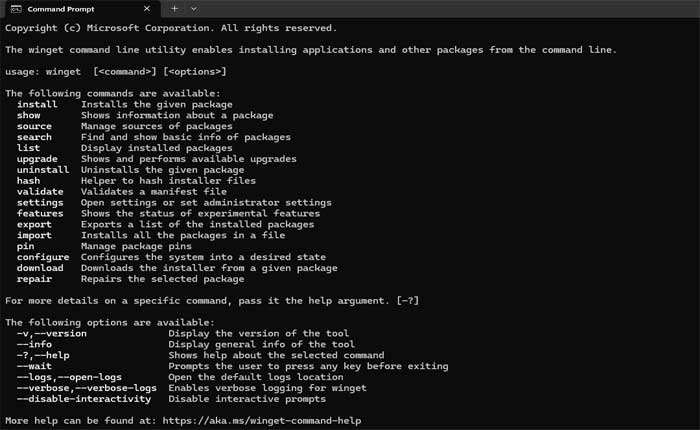
- You can download and install Winget from the Microsoft Store.
- Winget is included in the App Installer from the Microsoft Store.
- You can search for “App Installer” in the Microsoft Store and install or update it to get Winget.
- Alternatively, you can manually install Winget by downloading the latest release from the Winget GitHub page and running the .msixbundle file
- After installation, you can open Command Prompt or PowerShell and type winget to confirm it’s installed and ready to use.
- Once Winget is installed, type the following command: winget install kitware.cmake
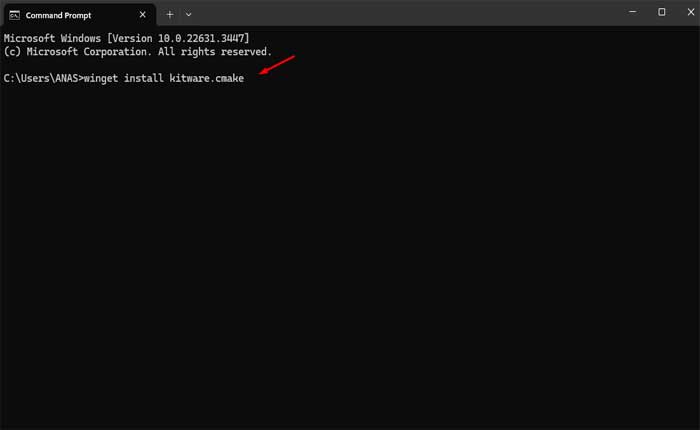
- After typing the command press Enter to start the installation.
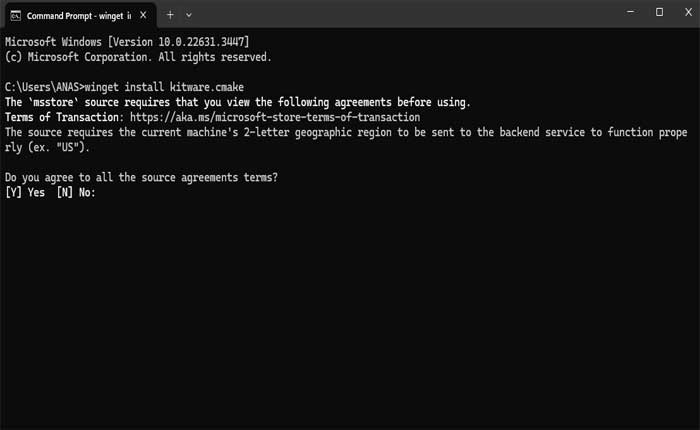
- Winget will prompt you to agree terms.
- Press Y and then Enter to proceed with the installation.
- Winget will download and install the CMake package along with any necessary dependencies.
- Wait for the installation process to complete.
- Once the installation is finished, you can verify that CMake has been successfully installed by typing cmake –version in the command prompt or PowerShell and pressing Enter.
- If CMake is installed correctly, you should see its version information displayed.
After the installation, you may need to restart your command line application or open a new tab for CMake to be accessible.
That’s how you can install CMake using Winget on your Windows system.
You can use CMake to manage the build process of your software projects directly from the command line.

