Are you facing the problem of Xcode Simulator Not Showing? If yes then don’t worry you are at the right place.
Xcode is an integrated development environment (IDE) developed by Apple, it is primarily used for software development on Apple’s platforms.
Xcode provides developers with a set of tools for creating, testing, and debugging software applications.
In Xcode, the Simulator is a tool that allows developers to simulate the behavior of iOS, iPadOS, watchOS, and tvOS devices directly on their Mac computers.
It provides a virtual environment for testing and debugging applications without the need for physical devices.
However, many users are facing the problem of Simulator Not Showing in Xcode.
Today i will show you how you can possibly fix this problem with some effective methods.
How To Fix Xcode Simulator Not Showing
Here are some steps you can try to fix the problem:
Restart Xcode:
Sometimes, simply restarting Xcode can resolve issues with the Simulator not showing up.
Quit Xcode completely and then relaunch it to see if the Simulator appears.
To do so:
- You can do this by clicking on the “Xcode” menu in the menu bar at the top of the screen, and then selecting “Quit Xcode.”
- Alternatively, you can press Command + Q while Xcode is active to quickly quit the application.
- Once closed, relaunch the application and then you can attempt to open the Simulator again.
Check Xcode Installation:
Make sure that Xcode is installed correctly on your Mac and that you are running the latest version available.
You can download and install Xcode from the Mac App Store or from the Apple Developer website.
Make sure you are using the latest version of Xcode, as compatibility issues can cause simulators to not appear.
Ensure Compatibility:

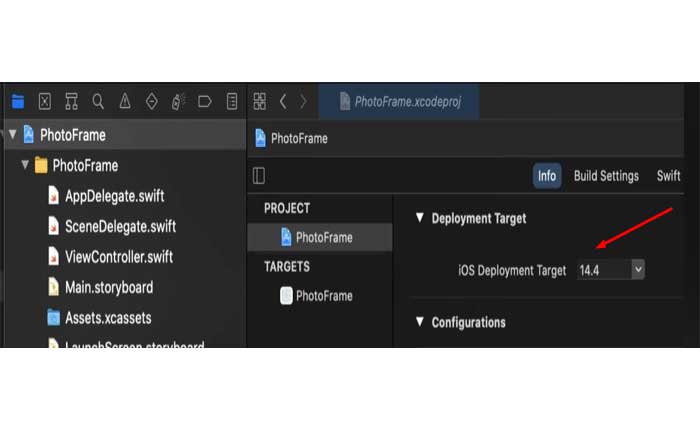
Check that the iOS Deployment Target in your project’s build settings is not higher than the simulator’s iOS version.
For example, if your project’s iOS Deployment Target is set to iOS 15.0, but you are trying to use a simulator that runs iOS 14.0, the simulator will not be available for use because it’s not compatible with your project’s settings.
To fix this issue, you can either:
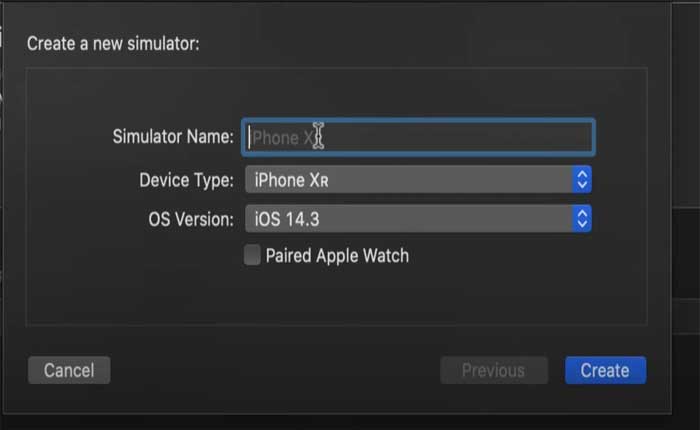
- Update the Simulator: Choose a simulator that matches or exceeds the iOS Deployment Target version.
- Lower the Deployment Target: Adjust the iOS Deployment Target in your project’s build settings to match the simulator’s iOS version.
You can try adding the new simulators:

- Xcode->Window->Devices->Add simulators
From there you should be able to just create whatever new simulators you need to use.
Delete Derived Data:
This folder is where Xcode stores build outputs, intermediate files, and other data such as indexes and logs that are generated during the build process.
Over time, this folder can grow quite large and may cause issues with your Xcode projects, such as slow performance or build errors.
Here’s how you can delete the Derived Data:
- Open Xcode.
- Go to the menu bar and select Xcode > Preferences.
- Click on the Locations tab.
- Look for the Derived Data section.
- You will see the path to the DerivedData folder.
- Click on the arrow icon next to the path to open the DerivedData folder in Finder.
- Delete the contents of the folder.
You can select all sub-folders and move them to the Trash and then restart Xcode.
Reinstall Xcode:
If none of the above steps resolve the issue, you may need to reinstall Xcode on your Mac.
Completely uninstall Xcode and then reinstall it from the Mac App Store or from the Apple Developer website.
These were the steps you can try to fix Xcode Simulator Not Showing problem.

