Stable Diffusion is an AI powered image generating tool that has the potential to generate high quality images like other AI tools such as Open AI, Midjourney and others.
The best thing about Stable Diffusion is it lets you generate images by giving the textual descriptions or prompts. In this guide, we will walk you through the process of running Stable Diffusion on Google Colab.
For the unversed, Stable Diffusion is a AI generator released by Stability AI which is a London and California-based startup company.
This AI trained on 512×512 images from a subset of the LAION-5B database which is a freely accessible multi-modal dataset.
Without any further ado, let’s get started:
How Does Stable Diffusion Work?
Let’s try to understand how Stable Diffusion actually works. It is based on a particular type of diffusion model called Latent Diffusion.
Diffusion Models are iterative models that take random noise as inputs which can be conditioned with a text or an image so it’s not completely random. For a more detailed overview of how they work, click on this link.
Without any further ado let’s see how to run stable-diffusion on Google Colab.
Running Stable-Diffusion on Google Colab
There are tons of users who want to run or use Stable Diffusion on Google Colab but they don’t know and if that’s you then follow the steps written below:
- First, go to the official Google Colab page by clicking here.
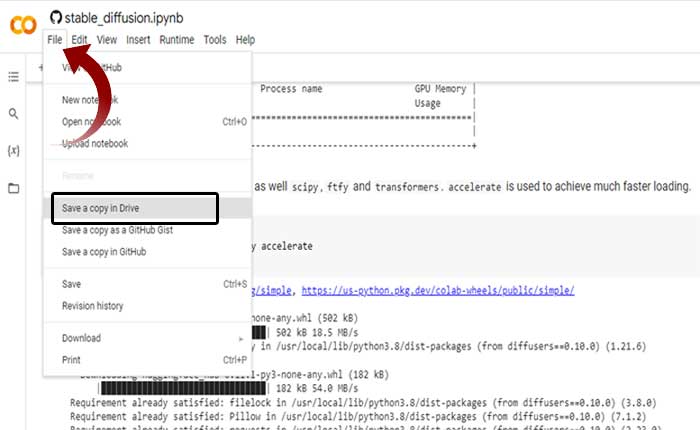
- Now click on the “File” option which an be found at the top left side and then choose “Save a copy in Drive” to save the program in your G drive.
- Next step is to Create a Hugging Face account & get a token. For that, you have to login to the “Hugging Face” and then go to “Settings” and click “Access Token” to obtain a token.
- Access the model card below, verify your license, press “Access Repository,” log in to Hugging Face and agree.
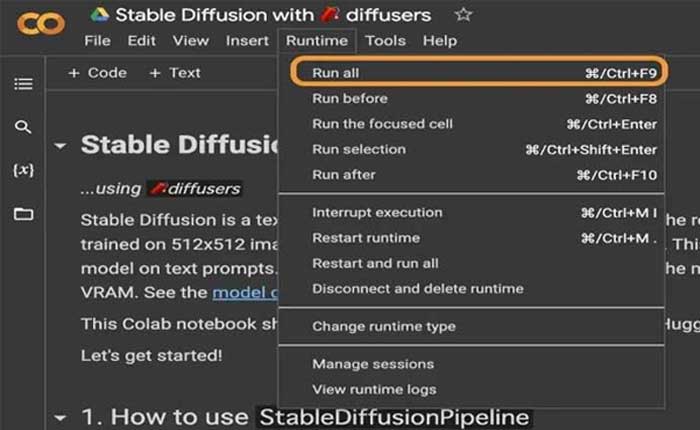
- Now execute the program for that go to “Runtime” and choose “Run all”
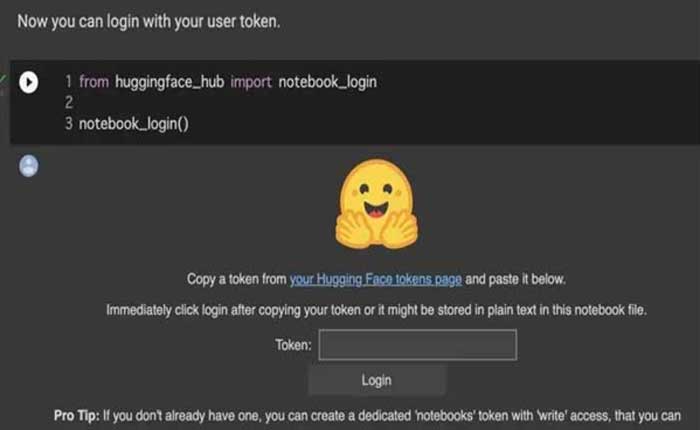
- When you execute the program, you will be asked for a token as shown below, enter the token you just generated, and press Login.
- If you perform these steps correctly, it will generate many images of astronauts on horseback.
- That’s it.
You can download the latest version of Stable Diffusion click on this link.
Generate Images You Like:
Use the following codes and generate any image you like by changing “a photograph of an astronaut riding a horse” to any character.
num_images = 3
prompt = [“a photograph of an astronaut riding a horse”] * num_images
with autocast(“cuda”):
images = pipe(prompt)[“sample”]
grid = image_grid(images, rows=1, cols=3)
Grid
How to Get Desired Prompts?
There are plenty of websites available on the internet where you can get prompts for Stable Diffusion. If you are new to his and are having trouble finding the desired prompt to use on Google Colab then don’t worry, we have got you covered.
To get prompts based on your choice, follow the steps written below:
- First, visit a website called Lexica.art.

- After visiting the site, enter the term that you want to get prompt for.
- Once entered, click on the ‘Search’ button.
- When you do so, you will see plenty of images whose prompts you can get.
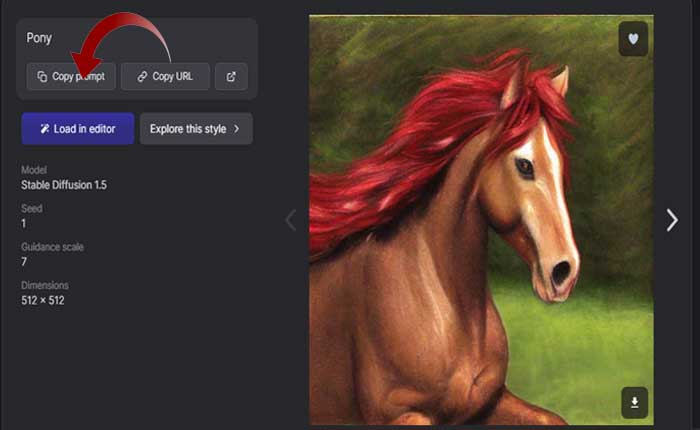
- Select your favorite image and click on the Copy Prompt.
- When you click on it, you will have the prompt copied on your Clipboard.
- Now, you can use that prompt on Google Colab.
- That’s it.
That’s everything you need to know about how to run Stable Diffusion on Google Colab.

1 thought on “How to Run Stable Diffusion on Google Colab (2024)”